Interactive Jobs
Interactive jobs function as if you were programming regularly from your terminal. We generally launch interactive jobs when we need to move large amounts of data or when we’re testing or debugging short bits of code. We can launch an interactive job in similar ways using Slurm or Torque.
Slurm
In Slurm, you start interactive sessions with salloc (think: “slurm allocate”). Go into a subcluster that has GPUs and try:
salloc -N 1 -n 1 -t 30:00 --gpus=1
Each flag denotes a different resource request: -N (or --nodes) for nodes, -n (or --ntasks) for cores, -t (or --time) for time, and --gpus (or -G) for … GPUs. So this is a request for 1 node, 1 core, and 1 GPU, for 30 minutes.
There are many more examples on the updated HPC website here.
After running salloc, you will see some feedback from the resource manager — in this case, for such a meager request, it will likely immediately say that it has allocated your requested resource and then place you into a new shell like [gu03] or [vx02] or whatever depending on your entry subcluster.
Test that you actually got the GPU you requested with a command like:
[gu03] nvidia-smi
which should return something like
+-----------------------------------------------------------------------------------------+
| NVIDIA-SMI 550.54.15              Driver Version: 550.54.15      CUDA Version: 12.4     |
|-----------------------------------------+------------------------+----------------------+
| GPU  Name                 Persistence-M | Bus-Id          Disp.A | Volatile Uncorr. ECC |
| Fan  Temp   Perf          Pwr:Usage/Cap |           Memory-Usage | GPU-Util  Compute M. |
|                                         |                        |               MIG M. |
|=========================================+========================+======================|
|   0  NVIDIA A40                     On  |   00000000:81:00.0 Off |                    0 |
|  0%   22C    P8             22W /  300W |       0MiB /  46068MiB |      0%      Default |
|                                         |                        |                  N/A |
+-----------------------------------------+------------------------+----------------------+

+-----------------------------------------------------------------------------------------+
| Processes:                                                                              |
|  GPU   GI   CI        PID   Type   Process name                              GPU Memory |
|        ID   ID                                                               Usage      |
|=========================================================================================|
|  No running processes found                                                             |
+-----------------------------------------------------------------------------------------+
Cool!
Caveats: Double-check your pwd. Slurm defaults to where you ran salloc, Torque defaults to home. Also double-check your modules – Slurm should carry over what you had loaded at startup, Torque does not. Some other minor details and differences here.
Note that it doesn’t matter which node you are actually on. Any Conda environments you’ve created and any files you have have will exist just the same on any node. To see this, type in ls. You’ll see the same folders you saw when you ran ls from outside of the job. No matter what physical node you are running on on Vortex, you’ll always see the same folders and files.
You can run scripts from this node, in the terminal. A tricky bit emerges when you want to connect a Jupyter notebook or IDE session to this node — we’ll need to cover that in a different post.
When you are done in an interactive job, you can exit by hitting ctrl + d or typing exit.
Torque
Torque is now being discontinued but in case that changes, or you happen to be working with a system outside the HPC where this may be useful … here is an example of a command to create an interactive session in Torque:
qsub -I -l nodes=1:vortex:ppn=12,walltime=01:00:00
Let’s break down this line:
qsub: This is the command we use to submit a job to the queue. We will use this with non-interactive jobs as well.
-I: This argument makes the job interactive (dash capitol I (as in interactive))
-l: This argument specifies that we are next going to provide a list of arguments each separated by a comma (dash lowercase l (as in llama))
nodes=1:vortex:ppn=12: The formatting of this line must remain the same, however you can modify the number of nodes, sub-cluster and number of processors that you want. The computer will checkout the specified number of nodes and processors for you on the sub-cluster you name.
walltime: This is the amount of time you want to reserve the resources for. The maximum amount of time you can check-out on Vortex is 180 hours, however you should only checkout out nodes for as long as you think it will take your program to run. If your program exceeds the walltime limit, it will be terminated and all memory will be erased. The format is HH:MM:SS
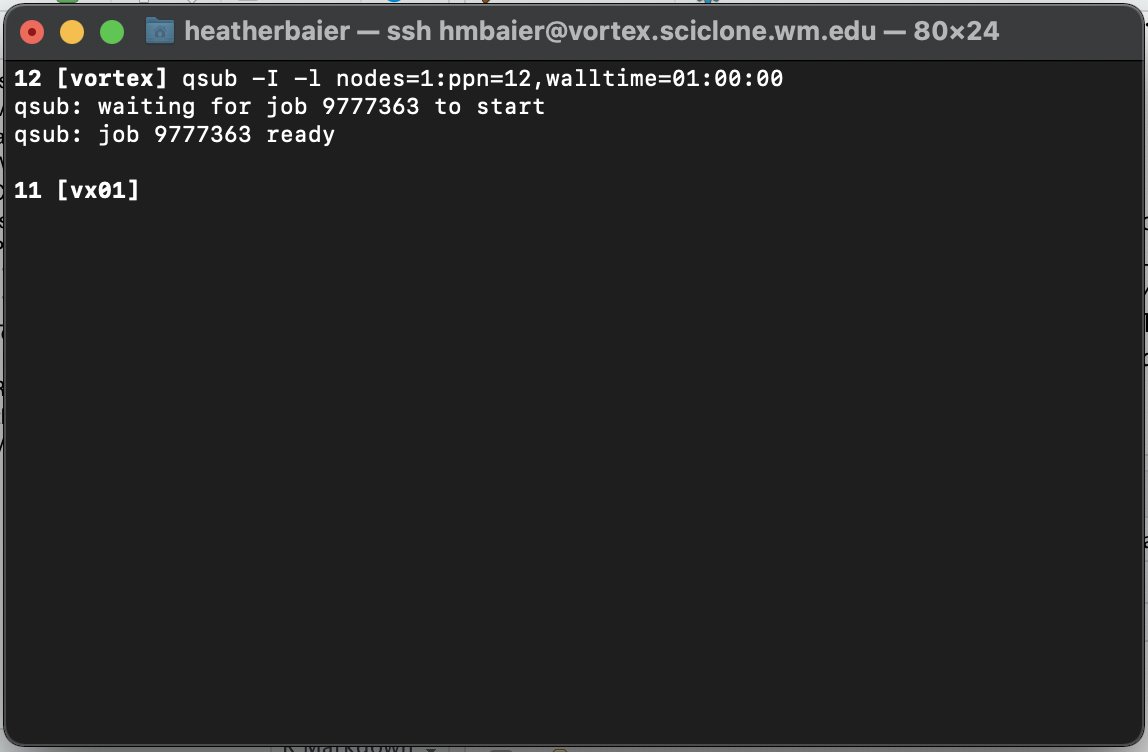
If you run the above line from your home directory, you should see something similar to:


On line 11 in the screenshot above, you can see [vx01] as opposed to the [vortex] in line 12. This means that now that you have launched a job, you are no longer running on the main Vortex infrastructure. Instead, you have now checked out 12 processors on Vortex Node 1 and are running your code from there. If the line read instead [vx02], that would indicate you were on Vortex Node 2. .